Plataforma de Educação Humanizada

Torne-se Membro

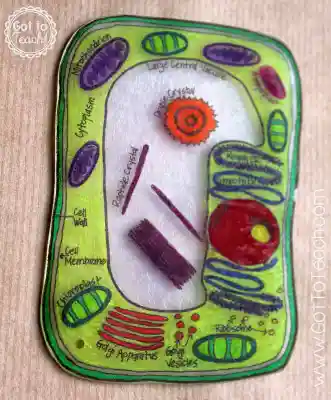
Shrinky Dink Cell Model

Disciplina: Ciências
Ano escolar: 3.º ano | 4.º ano
Tipo de Recurso:
Tags:

Materials Required:

Shrinky Dink sheets (available online or at craft stores)
Permanent markers or colored pencils
Scissors
Reference diagrams of plant and animal cells
Oven and baking sheet
Parchment paper
Labels or fine-tip markers for labeling organelles
Steps Involved:

Prepare the Materials: Provide each student with a Shrinky Dink sheet, permanent markers, and reference diagrams of both plant and animal cells.
Draw the Cell: Have students draw either a plant or animal cell on the Shrinky Dink sheet, including key organelles such as the nucleus, mitochondria, chloroplasts (for plant cells), and others. Use different colors for each organelle to make them easily distinguishable.
Cut Out the Cell: Carefully cut out the cell shapes from the Shrinky Dink sheet.
Bake the Models: Place the Shrinky Dink cell models on a baking sheet lined with parchment paper and bake them in a preheated oven according to the instructions provided with the Shrinky Dink material. Watch as the sheets shrink and thicken, transforming into smaller, sturdier models.
Label the Organelles: Once the models have cooled, students can label the organelles with fine-tip markers or attach small labels to each part.
Compare and Discuss: Have students compare their Shrinky Dink plant and animal cell models, discussing the differences in organelles and structures between the two types of cells.
Reflect: Encourage students to reflect on the process of creating the models and how it helped them better understand the structure and function of plant and animal cells.

pt_PTPortuguese