Plataforma de Educação Humanizada

Torne-se Membro

Creating a Topographical Map with Clay

Disciplina: Geografia
Ano escolar: 3.º ano | 4.º ano | 5.º ano
Tipo de Recurso:
Tags:

Crayola Air Dry Clay (or similar clay)
Dental floss (for slicing the clay model)
Rulers
Markers or pencils
Paper (for drawing the topographical map)
Optional: Graph paper (for more precise mapping)
Preparation:

Distribute Crayola Air Dry Clay and other materials to each student or group.
Prepare a workspace where students can mold and slice their clay models.
Creating the 3-D Model:

Modeling:
Instruct students to mold the clay into a simple mountain shape. They should aim for a shape that has varying heights and slopes.
Allow the clay models to dry according to the clay’s instructions (usually overnight or as needed).
Making the Topographical Map:

Slicing:
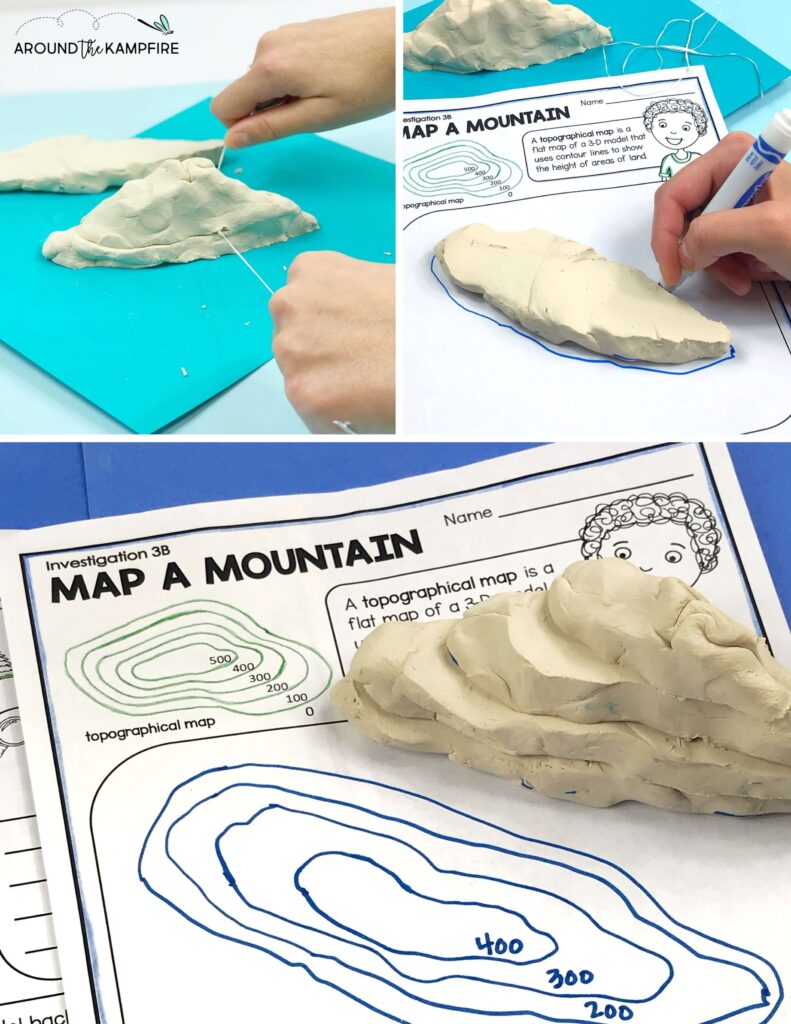
Once the clay is dry, use dental floss to slice the model into equal horizontal sections. Each slice represents a contour line on the topographical map.
Carefully remove each slice and set them aside.
Mapping:
On a piece of paper, students will draw a topographical map by sketching the contour lines. Each line should represent a different height level.
Label each contour line with its corresponding height. Students can use a ruler to make sure the lines are evenly spaced.
Detailing:
Students can add labels, such as “Mountain Peak” or “Base,” and mark specific features or elevation changes.
Conclusion:

Review the topographical maps and clay models with the class. Discuss how the 3-D model was translated into a 2-D map.
Reinforce the concept of topographical maps and how they use contour lines to show elevation changes.
Extension:

Introduce more complex landforms or larger models for advanced mapping.
Discuss real-world applications of topographical maps, such as in hiking or construction.

pt_PTPortuguese