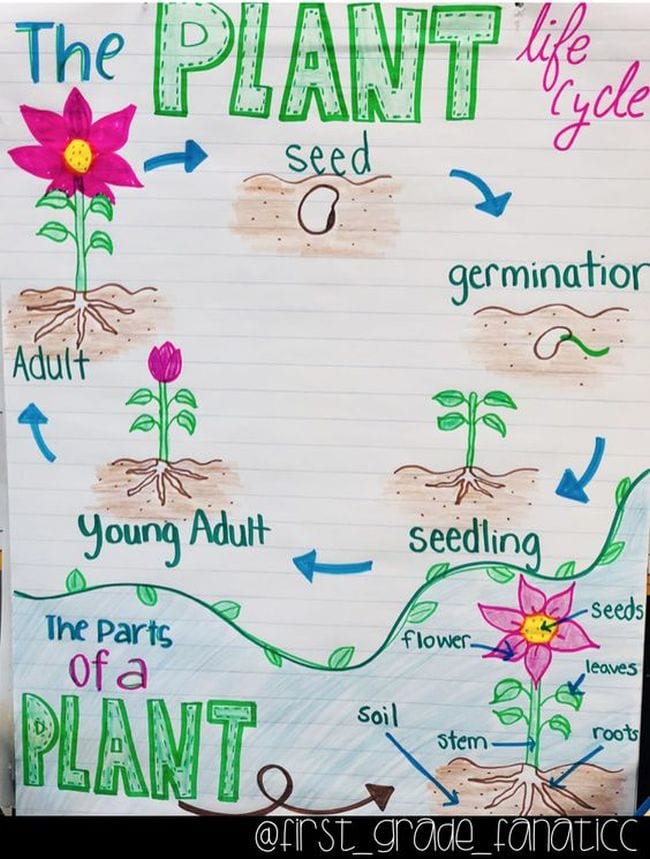
Materials Required:
Large poster paper or chart paper
Markers, crayons, or colored pencils
Images or drawings of the plant life cycle stages (e.g., seed, germination, seedling, mature plant, flowering, and seed production)
Glue or tape (for attaching images to the chart)
Optional: Stickers or decorative materials
Steps Involved:
Introduction: Explain the plant life cycle to the students, highlighting the stages from seed to mature plant and back to seed production. Discuss the parts of a plant and their functions.
Planning the Chart: On a large piece of poster paper or chart paper, draw a large circle or a series of connected stages to represent the plant life cycle. Leave space for students to add drawings or images.
Creating the Chart: Have students work together to create the anchor chart. Assign different stages of the plant life cycle to small groups or individual students. Ask them to draw or place images of each stage on the chart and label them accordingly (e.g., seed, sprout, leaf, flower).
Describing the Stages: As students add each stage to the chart, discuss the function and characteristics of each part of the plant life cycle. Encourage students to describe what is happening at each stage.
Posting the Chart: Once the anchor chart is complete, post it in a visible area of the classroom where students can refer to it during plant-related activities.
Review and Reference: Review the plant life cycle with the class, using the anchor chart to reinforce understanding. Encourage students to refer to the chart as they engage in hands-on learning activities related to plants.

