Plataforma de Educação Humanizada

Torne-se Membro

Bowl and Graph

Disciplina:
Ano escolar: 2nd
Tipo de Recurso:
Tags:

Inexpensive bowling set or homemade bowling pins (e.g., plastic bottles or cans) and a small ball
Large poster paper or graph paper
Markers or colored pens
Tape or sticky notes (for keeping score)
Introduction (5 minutes):

Explain the activity and its objectives. Discuss how the results of the bowling game will be represented on a graph.
Setting Up (10 minutes):

Set up the bowling area in the classroom or outdoor space. Arrange the pins or bottles in a bowling formation.
Show students how to keep track of the number of pins knocked down by each player.
Bowling Activity (20 minutes):

Divide students into small groups or pairs.
Have each student take turns bowling and keep track of the number of pins knocked down each time.
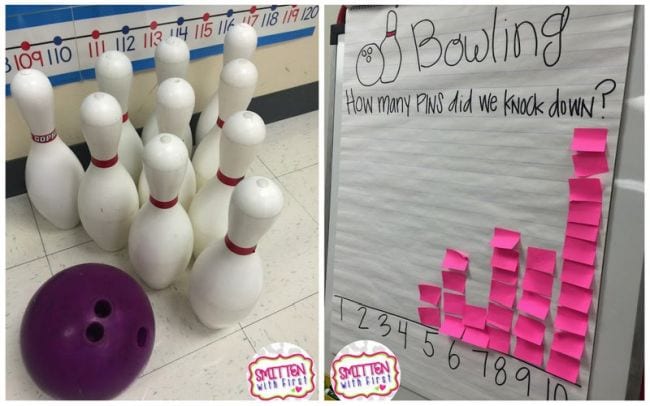
Use tape or sticky notes to record each student’s score.
Sorting and Counting (10 minutes):

After all students have had a turn, sort the recorded scores by each student.
Count the number of times each student knocked down a specific number of pins (e.g., 1 pin, 2 pins, 3 pins, etc.).
Creating the Graph (15 minutes):

Provide students with large poster paper or graph paper.
Show students how to set up their graph with categories (e.g., number of pins knocked down) on the x-axis and the number of times each score was achieved on the y-axis.
Have students draw bars to represent the frequency of each score.
Presentation and Discussion (10 minutes):

Allow students to present their graphs to the class, explaining the results and what their graph shows.
Discuss which scores were the most and least common and what can be inferred from the graph.
Review and Reflection (5 minutes):

Recap the key components of graphing and how it helps in organizing and interpreting data.
Ask students what they enjoyed about the activity and what they learned from it.